How to Convert SVG to DST for Embroidery?
Vector artwork is one of the best starting points for machine embroidery because it is clean, scalable, and easy to edit. But an SVG file is still a graphic file, not an embroidery file. Before an embroidery machine can stitch the design, the artwork must be translated into stitch instructions.
This guide explains how SVG to DST conversion actually works, why simple file conversion is not enough, what makes a good source design, and how to avoid the problems that often appear when vector artwork reaches the embroidery machine.
Key Takeaways
- SVG is a vector graphics format; DST is an embroidery machine format.
- You cannot create a proper embroidery file simply by changing the file extension.
- The SVG artwork must be digitized into stitch paths.
- Vector artwork usually gives a digitizer a cleaner starting point than a blurry JPG.
- Stitch type, density, direction, sequence, fabric, and final size all affect the result.
- Test stitching is recommended before bulk embroidery production.
Can an SVG File Be Turned Into a DST File?
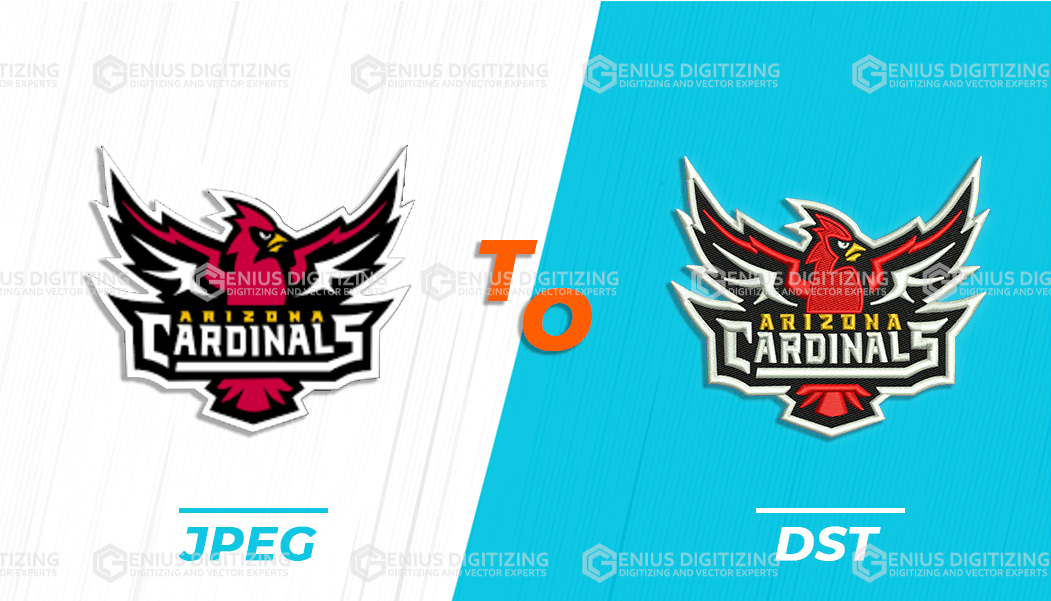
Yes. To convert svg to dst, the vector artwork must first be interpreted as embroidery. Shapes, lettering, outlines, and fills are assigned stitch types, directions, densities, underlay, and sewing order. The finished file then contains machine instructions rather than normal graphic information.
This distinction is important. A normal converter may be able to change one image format into another, but embroidery needs more than a new extension. The machine must know exactly how the needle should move through the design.
What Is an SVG File?
SVG stands for Scalable Vector Graphics. Unlike a JPG or PNG, which is normally built from pixels, an SVG uses mathematical paths, curves, lines, and shapes.
That gives SVG artwork an important advantage: it can usually be resized without becoming blurry. Designers commonly use SVG files for:
- Logos
- Icons
- Typography
- Illustrations
- Cutting-machine artwork
- Brand graphics
- Simple line designs
For embroidery digitizing, clean vector artwork is useful because shapes and edges are easier to identify. The digitizer can clearly see where one object ends and another begins.
However, a perfect SVG is not automatically a perfect embroidery design. Thread behaves differently from digital artwork.
What Is a DST Embroidery File?
DST is a widely used machine embroidery format originally associated with Tajima embroidery systems. It contains stitch and movement instructions that an embroidery machine can follow. Instead of storing a normal picture, the file tells the machine how the needle should travel through the design.
In simple terms:
|
SVG File |
DST File |
|
Describes graphic shapes |
Describes embroidery movements |
|
Used for visual design |
Used for machine stitching |
|
Can scale cleanly |
Prepared for a specific embroidery size |
|
Does not contain stitch planning |
Contains machine stitch instructions |
|
Viewed in graphic software |
Loaded into embroidery systems |
This is why changing the filename from .svg to .dst will not work. The internal information is completely different.
Why Does SVG Artwork Still Need Digitizing?
Imagine a simple circle in an SVG file. The computer understands the circle as a vector shape. An embroidery machine needs much more information.
Should the circle be stitched as a satin border? Should the inside be filled? In which direction should those stitches run? How dense should they be? What underlay will support them? Where should the machine begin and end?
The same decisions apply to every part of the artwork. Digitizing controls elements such as:
- Satin stitches
- Fill stitches
- Running stitches
- Stitch direction
- Stitch density
- Underlay
- Pull compensation
- Color sequence
- Trims
- Jumps
- Start and stop points
Good digitizing translates the appearance of the design into something thread can reproduce effectively.
What Makes an SVG Suitable for Embroidery?
Not every vector design will stitch well without changes. A strong embroidery design usually has clear shapes, readable lettering, sensible spacing, and enough room between small elements. Very thin lines, tiny details, gradients, shadows, and complex effects can create problems.
Before digitizing, examine your SVG and ask: Would this detail still be visible if it were made from thread instead of pixels?
If the answer is no, the design may need simplification. Here is a useful comparison:
|
Better Starting Point |
May Need Adjustment |
|
Bold logo shapes |
Hairline strokes |
|
Clear lettering |
Tiny text |
|
Solid color areas |
Gradients |
|
Defined borders |
Soft shadows |
|
Simple icons |
Photo-like detail |
|
Good spacing |
Crowded elements |
Embroidery does not need to copy every tiny feature of digital artwork. The goal is to preserve the identity of the design while making it practical to stitch.
How Does the Conversion Process Work?
A professional workflow usually begins by reviewing the SVG artwork and the intended application. The digitizer needs to know where the design will be stitched because a file for a polo shirt may need different preparation from one intended for a cap.
A typical workflow looks like this:
- Open and inspect the SVG artwork.
- Remove unnecessary graphic elements.
- Confirm the final embroidery size.
- Identify the garment or fabric.
- Separate the design into stitchable sections.
- Select appropriate stitch types.
- Set stitch direction and density.
- Add underlay where needed.
- Arrange the sewing sequence.
- Set trims, jumps, and color stops.
- Export the design in DST format.
- Review the stitch simulation.
- Test the design on suitable fabric if required.
Why Does Final Size Matter So Much?
Embroidery designs cannot always be resized freely after digitizing. This surprises people who are used to vector graphics. An SVG may be enlarged or reduced almost endlessly because its shapes remain mathematically defined. An embroidery file contains physical stitches.
If a design is reduced too much, lettering can become crowded and stitches may overlap. If it is enlarged too far, stitch spacing and coverage may become unsuitable. For this reason, always tell the digitizer the final size before the file is created.
A 2.5-inch chest logo and an 8-inch jacket design should not simply use identical stitch settings.
Does Fabric Change the Digitizing?
Yes. Fabric is one of the most important factors in embroidery.
A stable woven fabric behaves differently from stretchy knitwear. A towel has a raised surface. A cap is curved and may contain a center seam. Fleece is soft and thick. Lightweight fabric can pucker under excessive stitch density.
The digitizer may adjust underlay, stitch direction, density, sequencing, and other settings based on the intended material. That is why sending only the artwork without explaining the product can lead to weaker results.
Can Automatic Software Do the Conversion?
Some embroidery programs include automatic digitizing features. These can be useful for simple artwork, learning, or quick tests.
But automatic conversion does not always understand the practical needs of the finished product. Software may create too many stitches, choose poor directions, treat tiny details badly, or create unnecessary jumps and trims.
Automatic tools are most useful when the source artwork is simple. For business logos, uniforms, caps, patches, customer orders, and production runs, manual review is usually advisable.
What Are the Most Common Conversion Mistakes?
One common mistake is believing that clean vector artwork requires no preparation. Even a perfect graphic can produce bad embroidery if the stitch planning is poor.
Another is ignoring small text. Letters that look sharp on a monitor may become crowded once converted into stitches. Other common problems include:
- Excessive stitch density
- Unnecessary color changes
- Poor stitch direction
- Long jump stitches
- Designs that are too small
- Incorrect sequencing
- Ignoring the final fabric
- No sample sew-out before bulk production
Final Thoughts
Starting with an SVG gives you an advantage because the artwork is usually clean, sharp, and easy to interpret. But embroidery requires another layer of technical planning. The design has to move from shapes on a screen to thousands of physical stitches on fabric.
That transition is where digitizing quality matters most.
At Genius Digitizing, we work with embroidery shops, apparel brands, businesses, and creators across the USA to prepare high-quality, affordable, machine-ready embroidery files from vector and raster artwork. Each design is considered in relation to its final size, placement, and intended product so the resulting file is prepared for real production rather than only a digital preview.
A strong vector file gives the process a good beginning. Careful digitizing is what turns it into embroidery that actually works.
FAQs
Is SVG better than JPG for embroidery digitizing?
Often, yes. SVG artwork usually provides cleaner edges and scalable shapes. This gives the digitizer better source artwork to work from. However, the finished embroidery quality still depends on the digitizing itself.
Can I simply save an SVG as DST?
No. Graphic information must first be translated into embroidery stitches. Simply renaming or exporting without proper stitch planning will not create a production-ready design.
Can I use the same DST file on every fabric?
Not always. A design may need adjustments for different fabric types, placements, or major size changes.
Does DST store the original vector artwork?
No. DST is a stitch-based machine format. Keep your original SVG separately because it remains useful for future edits or creating new embroidery versions.
Should I test the file before a large order?
Yes. A sample sew-out can reveal alignment, density, lettering, tension, and fabric problems that may not be obvious in a software preview.