Convert JPG to DST Online: The Complete Guide

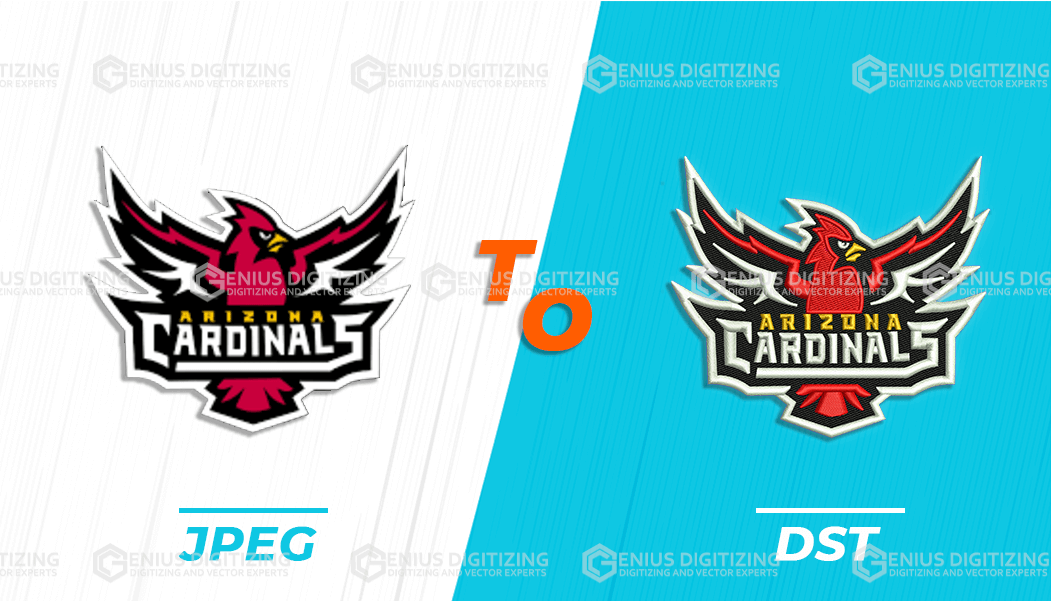
When you want to convert JPG to DST, you are not just changing one file name into another. You are preparing a picture for embroidery. A JPG or JPEG are exactly same and made for screens and printing, while a DST file is made for embroidery machines. That is why the process needs care, especially if the design includes a logo, small text, borders, or fine details.

This guide explains the full process in simple language. You will learn what a DST file is, why normal images cannot be stitched directly, when online conversion makes sense, and how to prepare your artwork for better results.

Key Takeaways

  • A JPG or JPEG is a normal image file, not an embroidery file.
  • A DST file gives stitch instructions to an embroidery machine.
  • Simple online tools may work for basic designs, but detailed logos usually need manual digitizing.
  • Clear artwork, correct size, and fabric details help improve the final embroidery.
  • A test sew-out is the best way to check the file before bulk production.

What Does JPEG to DST Conversion Mean?

To convert JPEG to DST, you turn a normal image into a stitch file that an embroidery machine can read. The image shows the design, but the DST file tells the machine where to sew, when to move, and how to form the artwork on fabric.

A normal image is built from pixels. These tiny dots create the picture you see on a screen. An embroidery machine does not follow pixels. It follows stitch commands. That means the design must be rebuilt in a way the machine can understand.

This process is called embroidery digitizing. In simple words, digitizing means turning artwork into a sewing plan. The plan decides the stitch type, stitch direction, stitch order, and thread stops.

Here is the basic difference:

File Type

What It Does

Used For

JPG/JPEG

Shows a picture

Viewing, sharing, printing

PNG

Shows a picture with possible transparent background

Digital artwork and design previews

SVG

Shows vector artwork

Clean design editing

DST

Gives stitch commands

Machine embroidery

This is why a JPG cannot become a good embroidery file through a simple file rename. The design needs to be planned for stitching.

What Is a DST File?

A DST file is a machine embroidery file format. It is commonly used in commercial embroidery because many embroidery machines and software programs can read it.

The file does not work like a normal image. It does not mainly store what the design looks like on a screen. Instead, it stores movement and stitch information. It guides the embroidery machine as it sews the design on fabric.

A DST file can include instructions such as stitch movement, jumps, trims, and stops. These instructions help the machine move from one part of the design to another.

One important point is that DST files usually do not store actual thread color names the way design software does. The file may include stops for color changes, but the machine operator often needs a color chart or production sheet to know which thread colors to use.

That is why you should not only ask for the DST file. You should also keep a preview image and a thread color guide if color accuracy matters.

Why Do You Need to Convert an Image Before Embroidery?

You need conversion because embroidery is not the same as printing. A printer can place ink on paper in tiny dots. An embroidery machine uses thread, needle movement, and fabric tension.

When you convert JPG to DST, the goal is to create a clean stitch path. The digitizer must decide how the machine will sew each part of the artwork.

For example, a filled shape may need one stitch type, while an outline may need another. Small text may need special handling so it does not close up during stitching. Curved shapes may need smooth stitch direction so they do not look rough.

The fabric also matters. A logo stitched on cotton may need different settings than the same logo stitched on caps, fleece, denim, towels, or polo shirts. Thick, stretchy, or textured fabric can affect the final look.

Good digitizing helps reduce common problems such as:

  • Uneven stitching
  • Broken or messy outlines
  • Hard-to-read text
  • Gaps between colors
  • Thread breaks
  • Fabric puckering
  • A design that looks different from the original image

This is why proper conversion is important for logos, uniforms, patches, caps, and branded clothing.

When Should You Use Online JPEG to DST Conversion?

You should use online conversion when you need an embroidery-ready file and do not have embroidery software or digitizing skills.

Online conversion can be helpful for:

  • Business logos
  • School badges
  • Name patches
  • Sports team designs
  • Cap embroidery
  • Jacket-back designs
  • Workwear and uniforms
  • Tote bags and promotional items
  • Custom gifts and merchandise

You should prepare the file before sending your design to an embroidery shop. This helps the shop review the design, estimate the stitch count, and set up the machine more quickly.

However, online conversion is not always equal. Some services use automatic software, while others use a real digitizer. Automatic tools can be quick, but they may not understand design quality, fabric type, or small details the way a trained person can.

For a very simple shape, automatic conversion may be enough. For a logo, badge, or professional design, manual digitizing is usually safer.

Where Can You Convert JPEG to DST Online?

You can convert JPEG to DST through online embroidery digitizing services, embroidery software platforms, or design service websites.

A good online service should ask for more than just the image. It should also ask for design size, fabric type, placement area, and any special instructions. These details matter because the same design may need different stitch settings for different uses.

For example, a small left-chest logo may not need the same stitch plan as a large back design. A cap design also needs special care because caps are curved and can shift during stitching.

Before choosing an online service, check whether they offer:

  • Manual digitizing
  • Stitch preview
  • Size adjustment
  • Thread color guidance
  • Revisions
  • Support for machine formats
  • Clear delivery time
  • A test sew-out option, if needed

A low-cost automatic tool may seem easy, but it can create problems if the final embroidery is for a client, uniform order, or business product.

Who Needs a DST File?

A DST file is useful for anyone who wants to turn artwork into embroidery. It is especially useful for people or businesses that need repeatable embroidery results.

This may include:

  • Embroidery shops that run customer designs
  • Clothing brands that sell embroidered products
  • Small businesses ordering staff uniforms
  • Schools and colleges creating badges
  • Sports teams making caps or jerseys
  • Event companies producing branded items
  • Designers preparing artwork for production
  • Merch sellers creating patches, bags, or apparel

If you are only viewing a design on a screen, you do not need a DST file. But if the design will be stitched by a commercial embroidery machine, a DST file is often required.

It also helps when you want the same design to be used again in the future. Once a design is digitized properly, it can be saved, reused, and adjusted for later orders.

How Does the Online Conversion Process Work?

The safest way to convert JPG to DST is through embroidery digitizing. This process turns the image into a stitch plan instead of only changing the file extension.

Here is how the process usually works:

  1. You upload the artwork.
  2. The digitizer checks image quality.
  3. The design size and placement are confirmed.
  4. The artwork is redrawn into stitch areas.
  5. Stitch types are selected for fills, borders, and text.
  6. Stitch direction and stitch order are planned.
  7. Thread stops and trims are added where needed.
  8. The design is saved as a DST file.
  9. A preview is checked before the file is used.
  10. A sample sew-out may be done for final approval.

The digitizer may use different stitch types depending on the design. For example, a satin stitch may be used for borders or letters, while a fill stitch may be used for larger areas. The goal is to make the design look clean while keeping it practical for the machine.

This is also where the stitch count is estimated. Stitch count affects production time and sometimes embroidery cost. A very dense design can take longer to sew and may not sit well on every fabric.

How Can You Prepare Your Image for Better Results?

The quality of your starting image can make a big difference. A clear image gives the digitizer better information to work with.

Before sending your file, try to prepare these details:

  • Use the highest-quality JPG or JPEG available.
  • Avoid blurry screenshots.
  • Send the original logo file if you have it.
  • Share the final embroidery size.
  • Mention the fabric type.
  • Mention where the design will be placed.
  • Tell the digitizer if small text must stay readable.
  • Share brand colors or thread color references if needed.

Simple artwork usually stitches better than very detailed artwork. If your image has shadows, gradients, tiny lines, or photo-like details, it may need to be simplified for embroidery.

This does not mean the design must look boring. It means the design must be adjusted so it works well with thread.

What Mistakes Should You Avoid?

The biggest mistake is thinking that embroidery conversion is the same as normal image conversion. It is not. A JPG can be changed to another image format quickly, but a DST file needs stitch planning.

Another mistake is using a low-quality image. If the logo is blurry, the final embroidery may also look unclear. Clean artwork gives better results.

You should also avoid making text too small. Very small letters can close up when stitched, especially on textured fabric. Thin lines can also disappear or look uneven.

Do not ignore the fabric type. A file made for flat cotton may not work perfectly on caps or towels. The digitizer needs this information before the file is made.

Finally, do not skip testing when the order is important. A digital preview is useful, but a real sample on fabric gives the most reliable result.

What Should You Check Before Production?

Before using the file for a full order, check the design carefully.

Look at the size first. Make sure it matches the placement area. A design that is too small may lose detail. A design that is too large may feel heavy on the fabric.

Next, check the thread colors. Since DST files may not carry full color details, keep a separate color guide or production sheet. This helps the machine operator choose the right threads.

Also check the stitch direction, outlines, and small letters. If the preview looks crowded, the real embroidery may look worse.

For bulk orders, ask for a sample sew-out. This lets you see the actual result before producing many pieces.

Final Thoughts

To convert JPG to DST properly, the design needs more than a simple file change. A JPG shows the artwork, while a DST file gives the embroidery machine the stitch plan it needs to sew the design on fabric.

Online tools can help with very simple artwork, but professional digitizing is usually better for logos, uniforms, patches, caps, bags, and customer orders. A well-made DST file can improve stitch quality, reduce production issues, and make the final embroidery look more polished.

At Genius Digitizing, we provide high-quality and affordable digitizing solutions for businesses, embroidery shops, clothing brands, and individuals who need machine-ready DST files. Our goal is to turn your JPG or JPEG artwork into clean embroidery files that are practical for real stitching and suitable for professional use.

Before placing a full order, check the design size, fabric type, thread colors, preview, and sample sew-out. These simple checks can save time, reduce mistakes, and help your embroidery look sharp from the first stitch.

FAQs

1. Can I convert JPG to DST online for free?

Some free online tools may create a basic embroidery file, but the result may not be clean enough for real production. A DST file needs proper stitch paths, stitch density, and machine movement instructions. For logos, uniforms, patches, and caps, professional digitizing usually gives better results.

2. Is a DST file the same as a JPG file?

No. A JPG is a normal image file used for viewing, sharing, or printing. A DST file is an embroidery machine file. It tells the embroidery machine how to sew the design with thread, stitches, jumps, trims, and stops.

3. Why does a JPG need digitizing before embroidery?

A JPG needs digitizing because embroidery machines cannot sew pixels directly. The image must be rebuilt as stitch instructions. Digitizing decides the stitch type, stitch direction, stitch order, and density so the design can be sewn properly on fabric.

4. What type of image gives the best DST result?

A clear, high-quality image gives the best result. Clean logos, sharp lines, simple shapes, and readable text are easier to digitize. Blurry screenshots, tiny details, gradients, and photo-like images may need cleanup or simplification before conversion.

5. Can a DST file be used on all embroidery machines?

DST is widely used in commercial embroidery, but not every machine uses the same format. Some machines may need PES, JEF, EXP, VP3, or another file type. Always check your embroidery machine’s supported format before production.

6. How long does JPG to DST conversion take?

The time depends on the design. A simple logo can be digitized faster than a detailed badge, complex artwork, or design with small text. Image quality, final size, fabric type, and revision needs can also affect the timeline.

7. Do DST files include thread colors?

DST files usually focus on stitch and machine movement data. They may include color stops, but they do not always carry full thread color details like some other embroidery formats. It is best to keep a preview image or thread color guide with the DST file.